We have created this tutorial to give you the steps neccessary to open the module in a modal (popup window)
The process we are demonstrating requires RokBox from
RocketTheme.com
This tutorial assumes that you already have both the 'Constant Contact Sign-Up Majix Pro' module and the RokBox Plugin installed.
(This tutorial was created using Joomla! 3.3.6 and our Constant Contact Sign-Up Majix Pro Module v2.1.6)
Brief Summary:
Create an article that will contain a placeholder to display the module.
Create an article
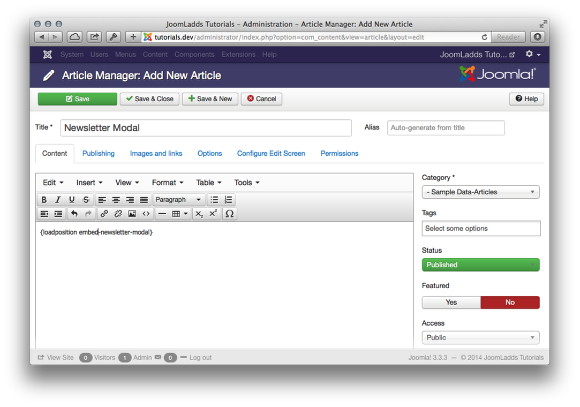
Create an article that contains the "loadposition" tag. In this case we entered the position of 'embed-newsletter-modal'. This position can of course be named anything you like, just remember it for the step to add it to the module position. The article can be named anything you like.
Create a menu item
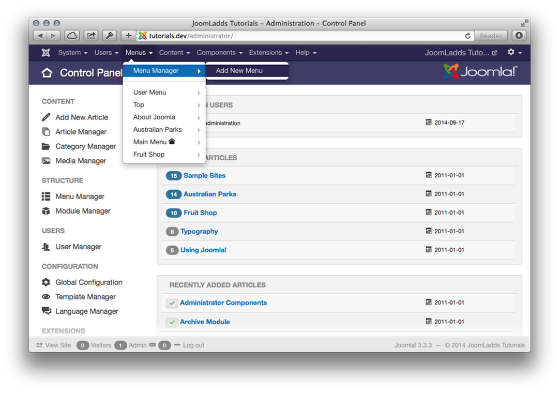
The simplest method that we use for accessing a single article (one that does not have a link from any other menu on our site) is to create a menu item that can be used as an SEF link.
You can choose to skip this step if you prefer to access the article directly using 'index.php?option=com_content&view=article&id=## (all you need is to replace ## with the article number) Or you can use any other SEF component.
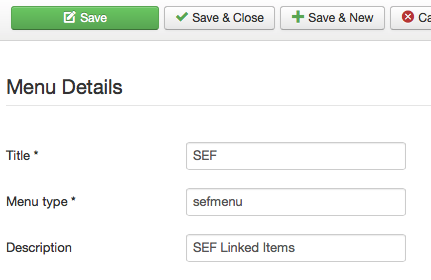
We created a new menu called 'SEF' so that any menu items added here can be accessed directly using the 'alias' that is created.
Once you have named the menu, Save & Close.
Create the Menu Item
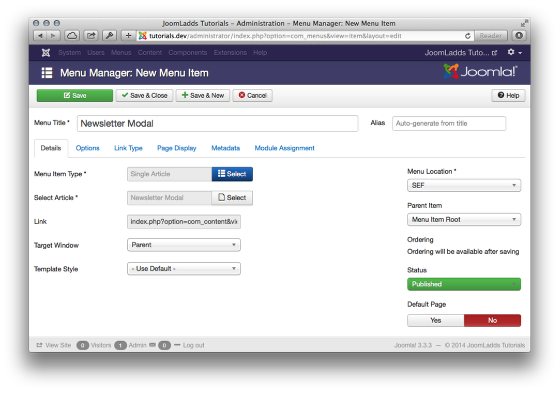
Then we created a 'Single Article' menu item and linked it to the article that was previously created.
Create a 'Custom HTML' Module
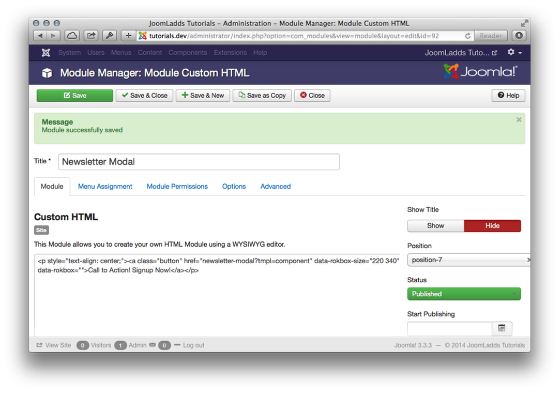
Either using the RokBox editor button (found just under the textarea), or by copying the following html to create the link that will be used to open the modal.
<p style="text-align: center;"><a class="button" href="/[PATH_TO_FILE]?tmpl=component" data-rokbox-size="220 340" data-rokbox>Sign-Up Now!</a></p>
Please note: The class applied to the <a> may change based on your theme and css usage. In our case, we used a 'button' class that was already defined for our Joomla! Template. But this can be any class you desire to get the correct look for your site.
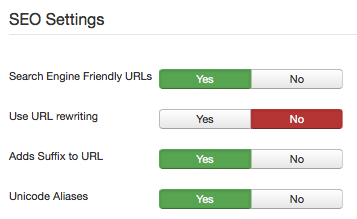
Additionally, if your Global Configuration does NOT have 'Use URL rewriting' enabled, then you would use a URL like:
index.php/newsletter-modal?tmpl=component
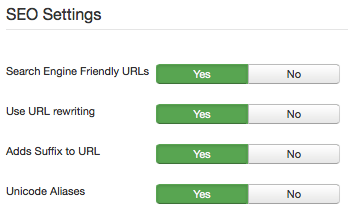
If your Global Configuration DOES have 'Use URL rewriting' enabled, then you would use a URL like:
newsletter-modal?tmpl=component or newsletter-modal.html?tmpl=component
The method you use again depends on a setting in your Global Configuration. (If you enabled 'Adds Suffix to URL' then add '.html', otherwise leave it off)
Lastly, these URL are examples only, your usage may vary depending on actual Menu Item names and if your Joomla! site is installed at the root location of your server.
Update the Position for the Sign-Up Majix Pro module
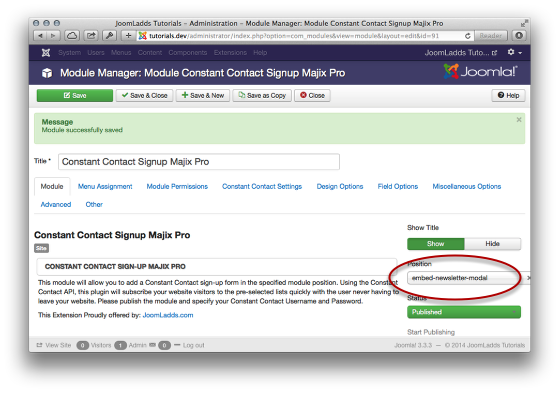
Enter the position just as you named it in the article for "loadposition". In our case it is 'embed-newsletter-modal'.
Check out your new link
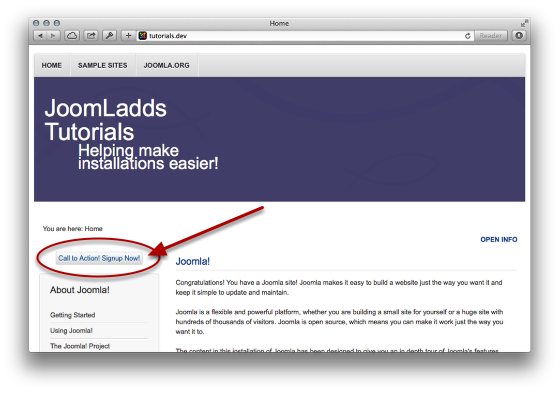
Our example Link. This can be a button styled by your site theme, or simply a text link.
View the modal
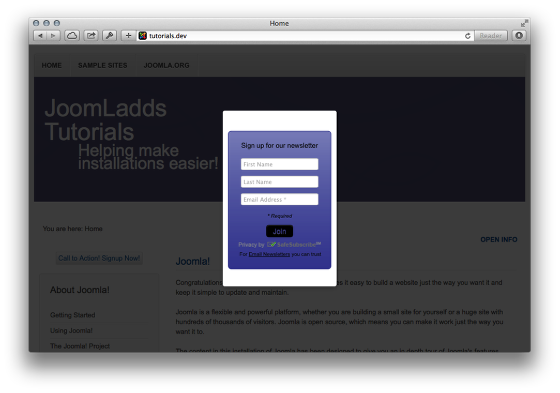
How our example looks in the new modal window.
View a Live Example
This link will open an example modal that we created on our site using these instructions.
OPTIONAL - Add a redirect for the landing page
An additional Optional step can be added if you would like to redirect the user to a new page once the form is submitted.
To set up a custom landing page, take a look at this
documentation.
This tutorial was created using ScreenStepsfrom BlueMango Learning Systems.
