This documentation will outline the steps to create a 'Custom Landing Page' for the Sign-Up Majix Pro Module (otherwise know as a 'Redirect to Menu Item')
(This tutorial was created using Joomla! 3.3.6 and our Constant Contact Sign-Up Majix Pro Module v2.1.6)
Create an Article
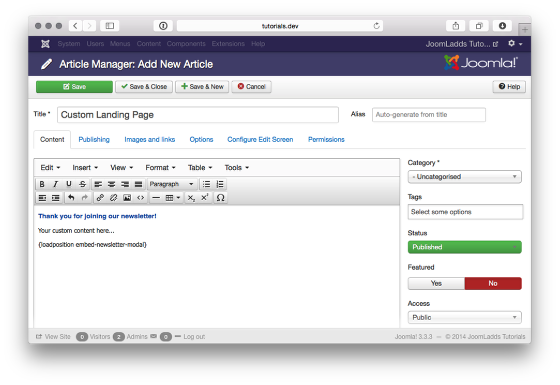
Create the page that will be used as the new landing page once a user successfully submits a form. **
** Module MUST Be Loaded on Landing Page (for versions prior to 2.2.1)
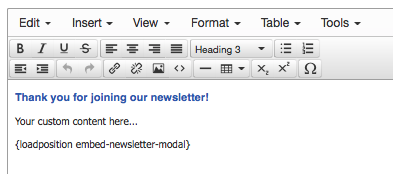
IMPORTANT: You MUST include the module on the landing page for the 'form submit' to be successful! If you fail to do this, the form data will not be sent to Constant Contact and the contact will NOT be added. (As of version 2.2.1, this is no longer required)
The method we used to load the module was to simply add the same { loadposition ### } that we used previously.
Create a menu item
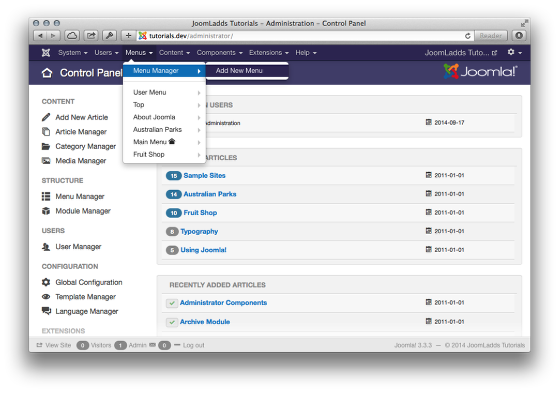
In order to point to the new landing page, you need to add it to a menu. If you do not need to have this page on a menu used by your site, you can use this simple method that we use for accessing a single article (one that does not have a link from any other menu on our site) - which is to create a menu item that can be used as an SEF link.
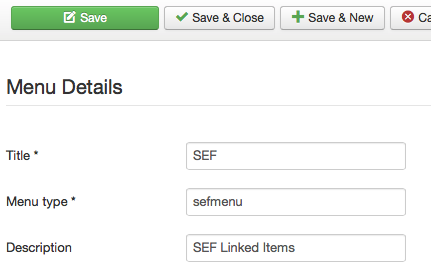
We created a new menu called 'SEF' so that any menu items added here can be accessed directly using the 'alias' that is created.
Once you have named the menu, Save & Close.
Create the Menu Item
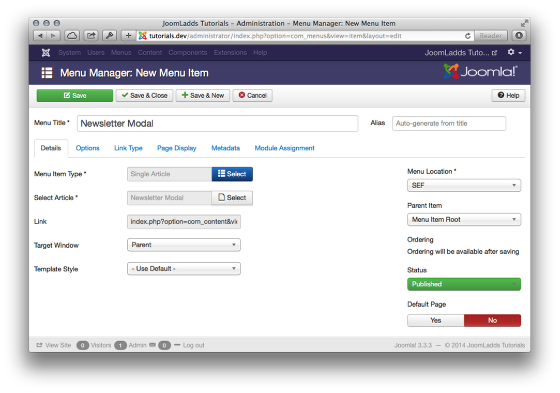
Then we created a 'Single Article' menu item and linked it to the article that was previously created.
Change the Module Parameters
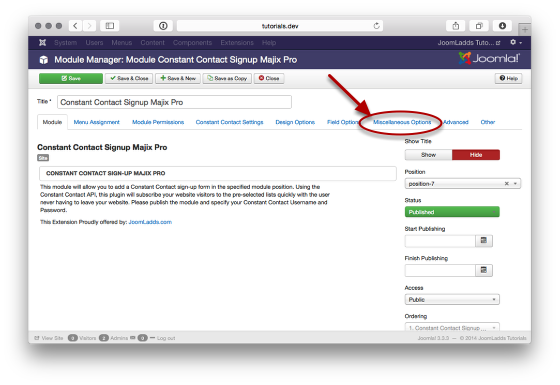
Using the Module Manager, locate the Constant Contact Sign-Up Majix Pro Module and open it to edit the parameters.
Click on the tab 'Miscellaneous Options'
Enable the Redirect
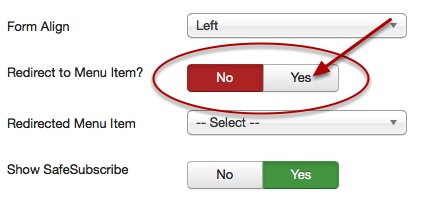
Scroll down and look for the setting 'Redirect to Menu Item?' and set to 'Yes'
Choose the Menu Item
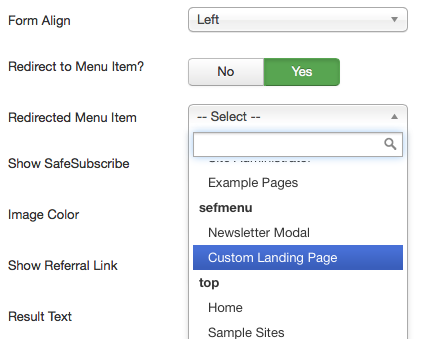
Select the Menu Item that will be used as the new landing page.
That's It!
Once you have those minor changes made, you can 'Save & Close'
This tutorial was created using ScreenStepsfrom BlueMango Learning Systems.
